I received free product from DecoArt for this post. As always, all opinions and ideas are my own.
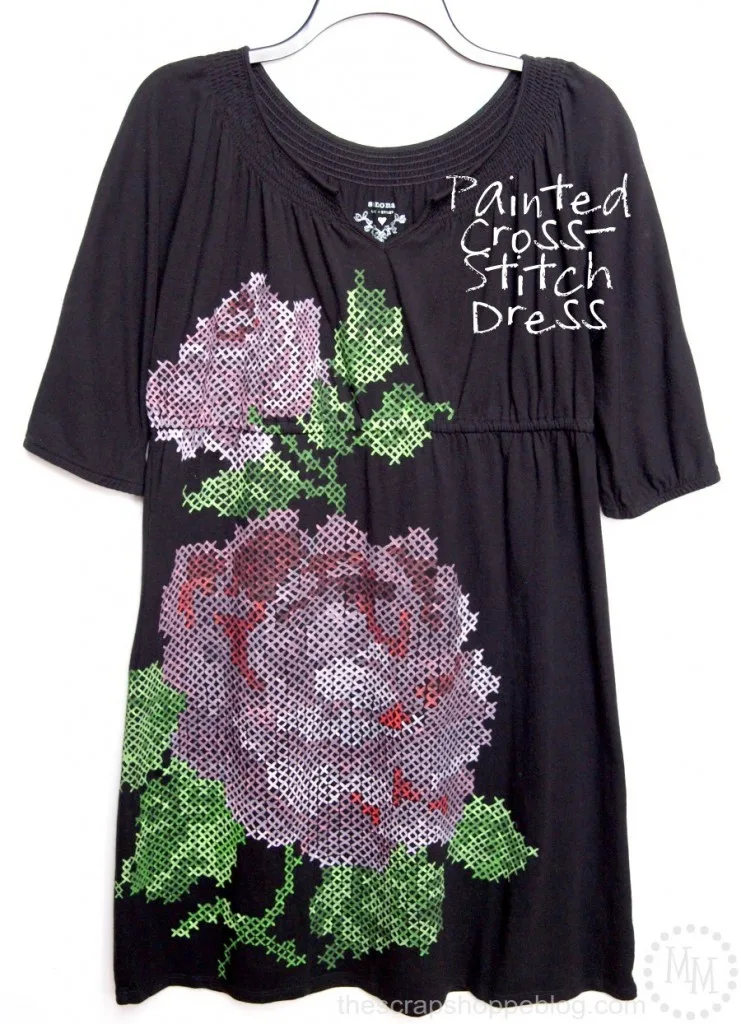
Talk about a transformation! This plain black dress hung in my closet for years, rarely worn and pretty boring. Now, I want to wear it everywhere!
Making over this dress has been on my to-do list for ages! My inspiration was the Pixelated Fleur dress from Anthropologie. But with cross-stitch being so chic and trendy right now, I opted for that look rather than the pixelation. With a little help from DecoArt’s SoSoft fabric paints, I was able to make it happen.
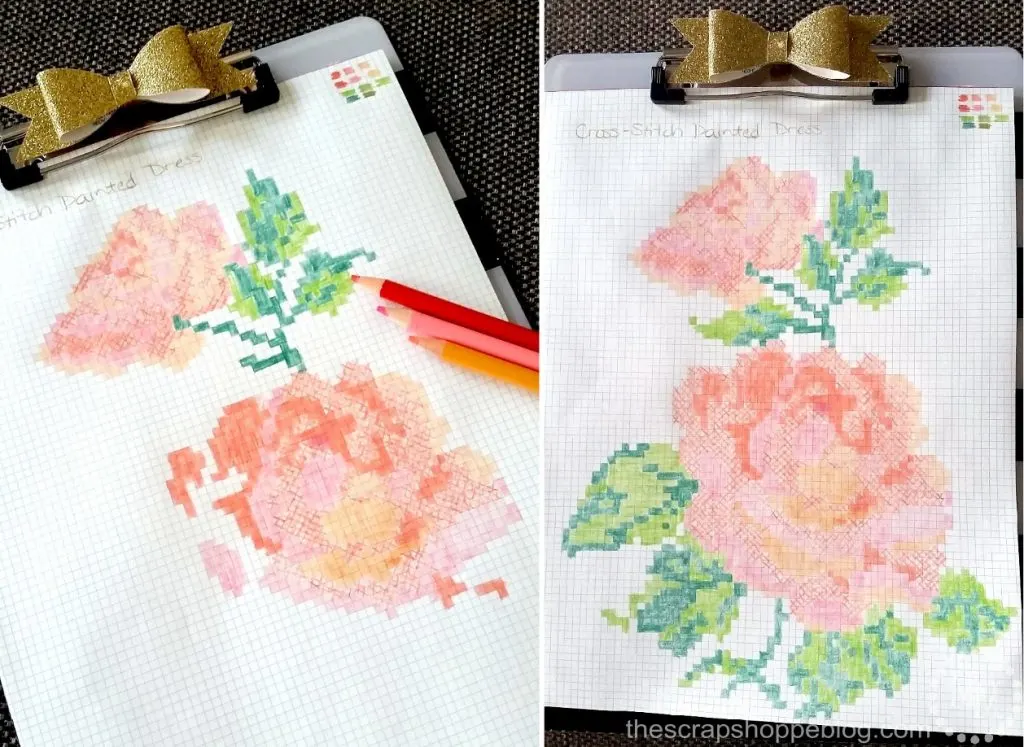 The first thing to do is find or create a pattern for your cross-stitch. I searched Google Images and Pinterest for a pattern that would fit my needs. I finally found a pattern someone has scanned and uploaded and drew it out on graph paper using my preferred color scheme. I took some liberties with the pattern to fit my needs and make it my own.


Supplies:
A dress or shirt to paint on
Wax paper-covered cardboard
DecoArt SoSoft in Bright Coral
DecoArt SoSoft in Bright Avocado
DecoArt SoSoft in White
Plastic containers for mixing paint
The SoSoft paints are made to paint on fabric. To better ensure proper shades for the pattern you can dilute the paint colors. The rose has 4 shades of coral. The Bright Color will act as the darkest shade so dilute 3 portions of the paint with the White to act as the lighter colors. The leaves have 2 shades of green so the Bright Avocado will act as the darker shade and you only need to dilute 1 portion for the lighter color.
Stir, stir, and stir some more to be sure your paint colors are fully mixed.
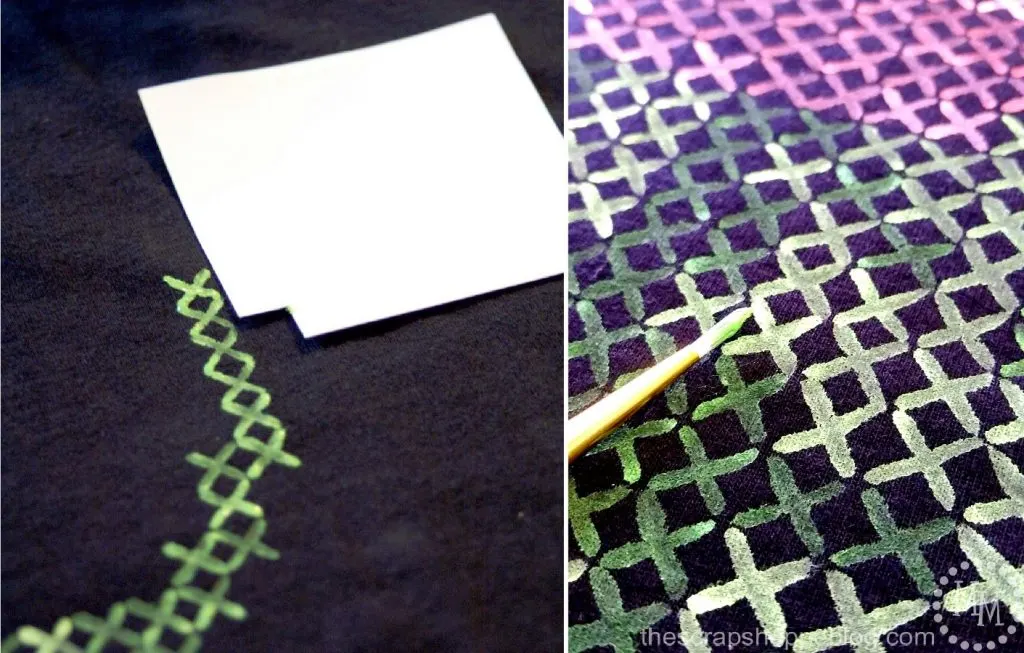 Place the wax paper-covered cardboard under the fabric, between the layers to prevent bleeding through.
You can determine how large the painted X’s need to be my measuring the length of your work surface (in this case the dress) and dividing by the number of rows in the pattern. I cut out a square in a piece of scrap cardstock that matched the size X I needed for my pattern. It is an easy way to make sure your X’s are all the same size, at least until you become comfortable enough to paint without it.
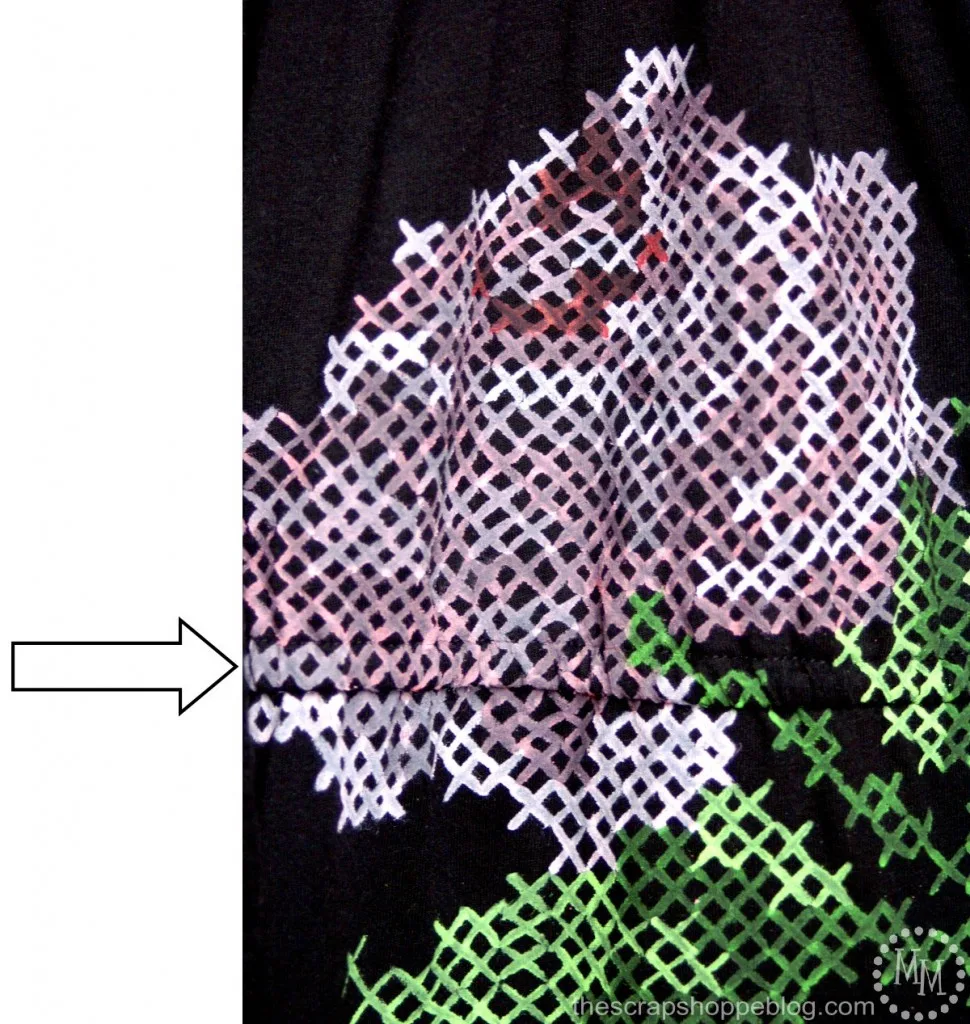 I recommend starting at the bottom and working your way up the pattern, having a paintbrush available for each color so you can change out easily as you go along. If you make a mistake, no worries! Just keep going because, in the end, no one is going to notice. Not even you!
The arrow above is pointing at the elastic for the high waist. To paint this area, I simply pulled the elastic taught to create the straight lines for the X’s.
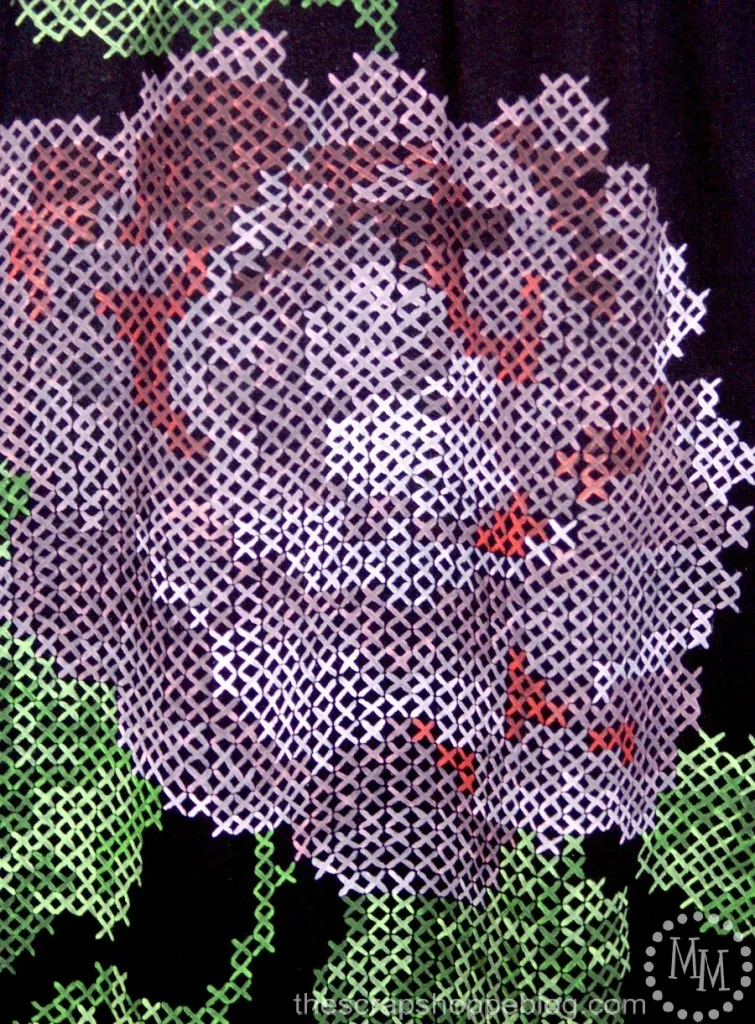
Up close, the pattern looks a little crazy and you cannot really tell what all of the shading is. But once you back away…
 …The pattern shows true! Admittedly, this dress took hours of time to complete, but it was fairly simple work and the outcome is totally worth it in my opinion.
And I love how the SoSoft colors look so vibrant on the black fabric! They really took a dull dress into something spectacular.


Julie
Tuesday 12th of March 2019
Oh my giddy aunt, I LOVE this idea. My daughter and I did a very similar (but much simpler) idea on her bedroom wall which did turn out great but to be able to wear your art - even better. A-maze-ing!!!
creativejewishmom/sara
Sunday 10th of March 2019
Wow, Michele, amazing! I want to do this on a wall sometime.......of course you can always use the dress as wall decor! thanks for sharing on craft schooling Sunday!
Aimee Aimee
Monday 16th of October 2017
Thank you for a great explanation. I was looking online for a similar idea and really appreciate it Custom Embroidery Digitizing
Cathy
Wednesday 6th of May 2015
I love this dress and can think of so many ways to use these paints. Such a wonderful transformation. Thank you for sharing at Share It One More Time. Cathy
Laura
Monday 4th of May 2015
This is amazing! I am so impressed. I am not sure I would have the patience to make something like this, but it looks completely amazing! Thanks for linking up to The Creative Exchange! xo, Laura