It has literally been a year in the making… but I am FINALLY sharing the reveal of my new craft room!
I honestly don’t know what took so long. I posted a sneak peek last March and intended to do a full craft room reveal in April. I’m just slow.
Just about everything has been complete except for some little details for quite a while. Angie’s Craft Room Tours series was a great excuse to finish things up!

For my new space I was going for bright, inviting, and overall a space that screamed for me to come be creative in.
I was also in dire need of storage and a large work table. I think I achieved it all!
I have yet to walk into my craft space and NOT feel inspired to get to work.
You can see my original craft space in this tour from 2014. My husband built that space for me when we moved into our home in 2004 when I was mainly scrapbooking.
As my crafting evolved, and eventually became a full time job, the need for a more functional space became painfully obvious.
I also want to mention that this is a shared space in our bonus room. I’m using ~1/4 of the room. The rest serves as playroom, movie room, guest room, and other household storage.

For Christmas last year I asked “Santa” to take me to Ikea to pick out storage units for a new and improved craft room. So the hubs gave me a homemade voucher to go shopping, and in January I made my first ever trip to Ikea!
I had mapped out my floor plan ahead of time and figured out which units would work in my space. I knew going in exactly which large pieces I was looking for.
These two 8-shelf Kallax shelving unit in High Gloss Turquoise (it doesn’t look like that color is available anymore – so sad!) flank the 16-shelf Kallax shelving unit in white and provided a TON of storage.
And since I didn’t want all my storage to be visible I also purchased the matching Kallax door inserts for the turquoise units, and the matching Kallax drawers and Lekman boxes for the white unit.
I also purchased some pretty glass knobs at Hobby Lobby to replace the ones that came with the doors and drawers. I painted them with DecoArt glass paint in pretty colors to match the room.
These shelving units hold the bulk of my craft supplies, from paper to paint to sewing supplies.
Anything I had in abundance such as ribbon, markers, stamps, and such went into bins and drawers.
Smaller collections like chalk supplies, stencils, and glitter went into smaller shoe boxes and 12×12 boxes in the open shelves.
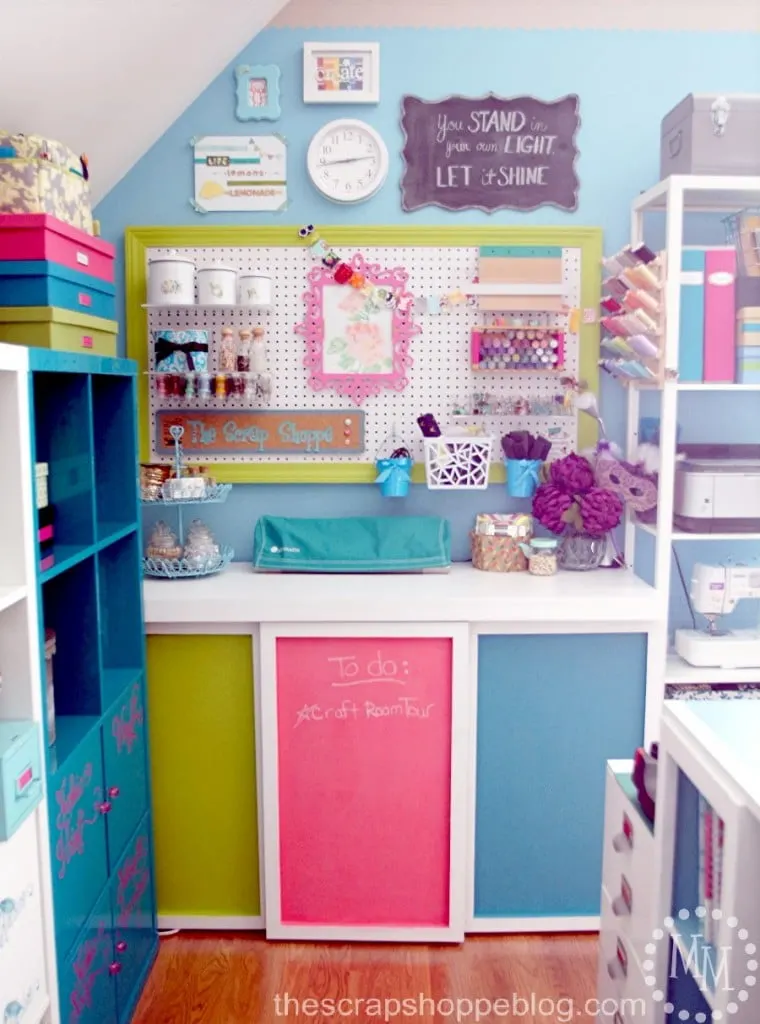
I really wanted a pegboard for display and visual storage.
The hubs custom made this one for me to size with white pegboard and framed it out with trim which I painted.
It’s hanging over another Ikea shelving unit, the multi-sized Kallax which we modified.

At some point I’ll post a tutorial for this Ikea hack, but basically the hubs built an extended topper for the shelving unit and we hung sliding barn doors on the front.
I painted the inset doors in my room colors and covered the pink with a couple coatings of DecoArt’s Chalkboard Clear Coating to turn it into a chalkboard surface.
I’m still deciding what to do with the other two doors.
I want as many places as I can in this room to be pretty AND functional if at all possible.
The shelves on this Kallax unit are pretty but they store mainly office supplies and half-done scrapbook albums – not very pretty supplies – so I wanted them covered up.
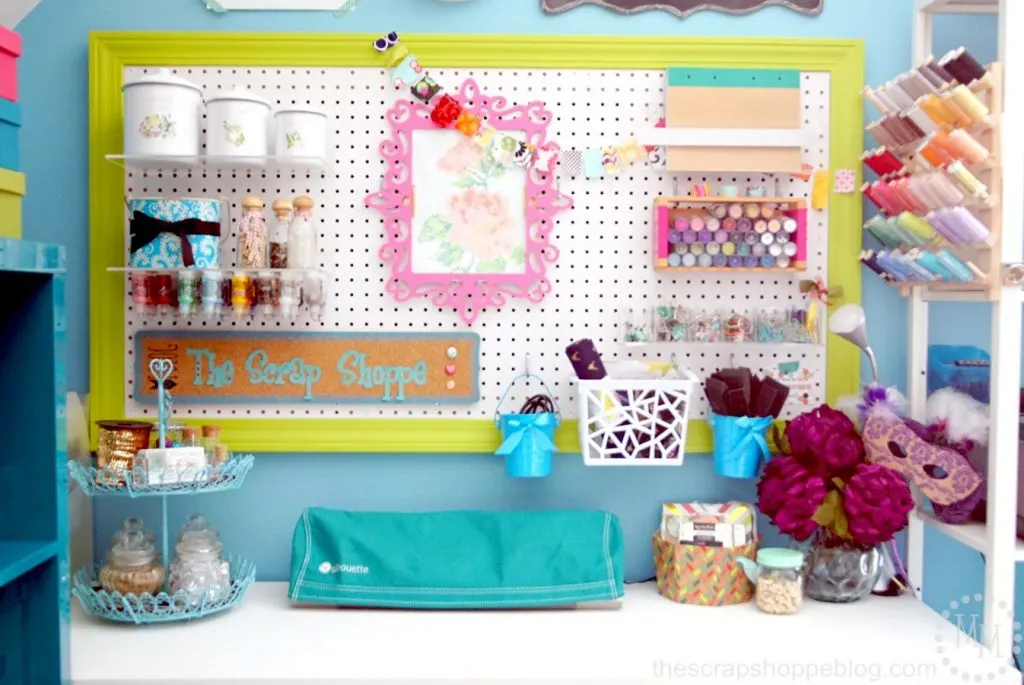
The storage on the pegboard is all acrylic.
I didn’t want anything that wouldn’t allow light to filter through since this corner is more in shadow.
My glitter glues are hanging upside down under one of the shelves with Velcro. I also have several of my smaller office supplies stored here such as paper clips and thumb tacks.
The wooden crate holds my Martha Stewart glitters.
The pocket at the top hold notebook with graph paper for when I make fabric or cross stitch patterns.
A couple of hanging buckets hold sponge brushes and the computer cord for my Silhouette Cameo, which you can see sitting on the tabletop.
Having the Silhouette OUT has me using it SO much more than in my old room setup where I had to rearrange things just to get it out. A good thing, because I use it a LOT for my Etsy shop right now.
You can also see my thread storage hanging on the side of the shelves. I attached it with 3M Velcro Strips. It keeps them within easy reach but out of the way of much needed surface space.
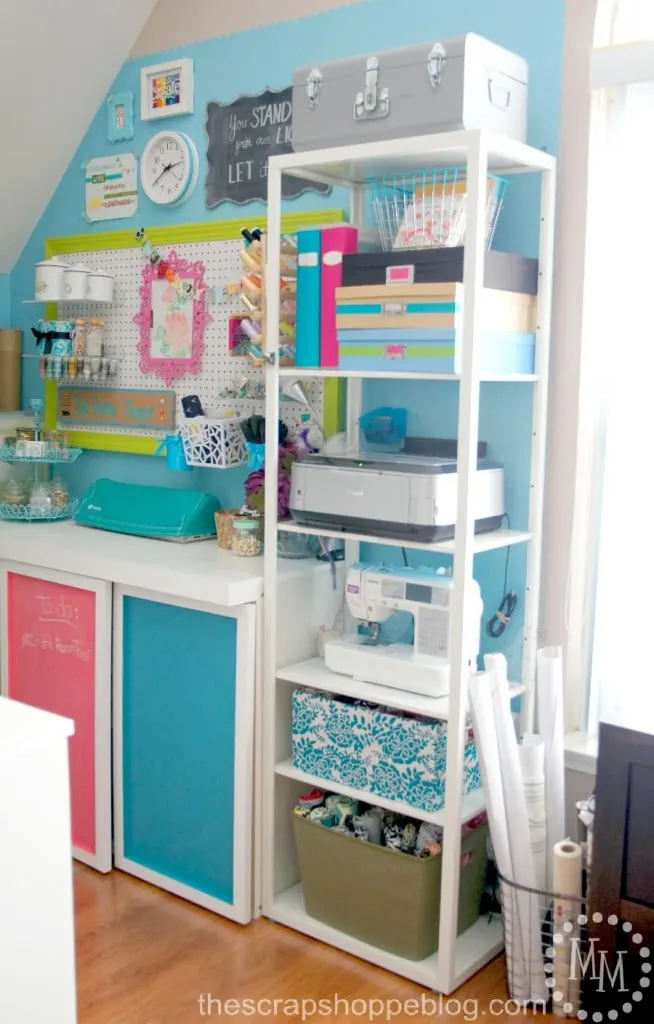
The last Ikea unit I wanted was the Fjälkinge shelf unit.
I happened to get the last one the Atlanta Ikea had that day we went shopping!
It was the perfect size to store larger items like my sewing machine and printer.
The bins at the bottom hold a majority of my fabric stash.
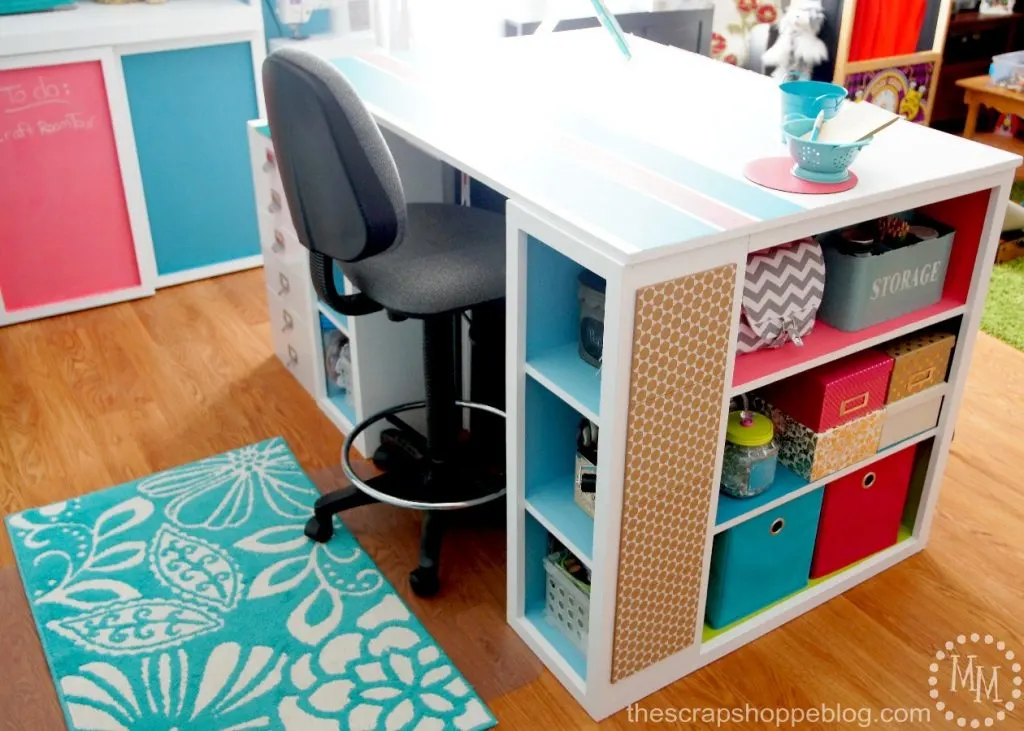
My awesome hubs built me the Ana White Modern Craft Table!
The huge work surface was a big difference from my previous setup. It also provided a ton of extra storage and the ability to keep commonly used supplies within easy reach like pencils, pens, and scissors.
This is easily my favorite feature in the room!
Having an island work station also allowed me to work in natural light rather than in shadow like my previous craft room setup.
The bright white paint really lights up the space, and I can even take some of my blog photos straight from it.
I painted all of the shelves in bright colors to match the rest of the space.
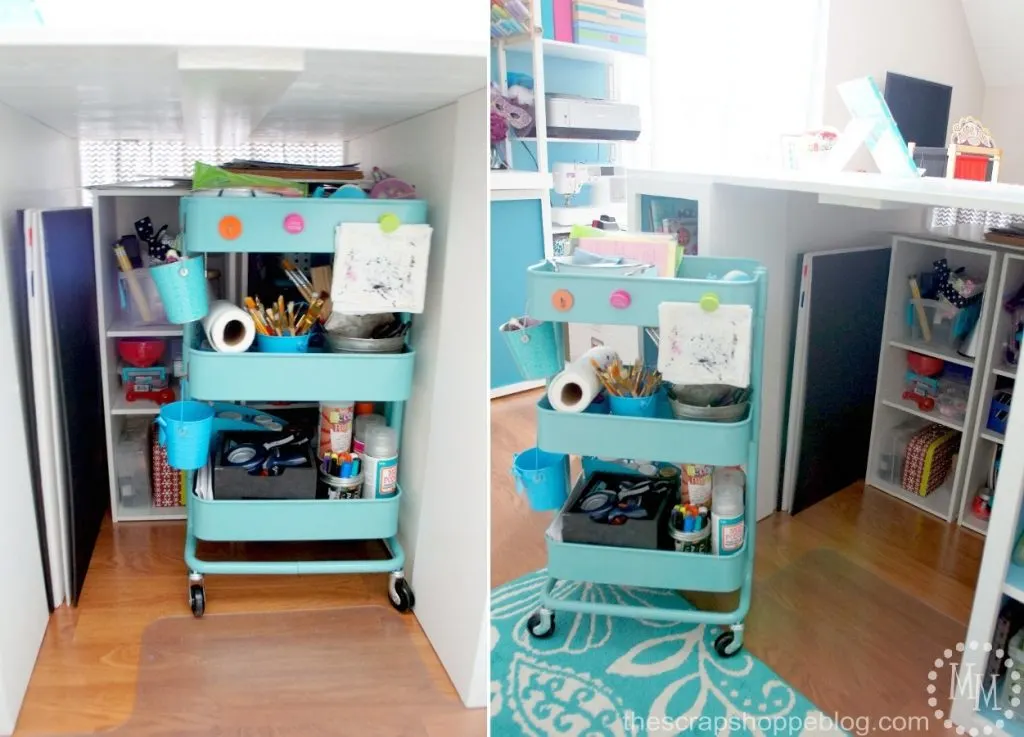
We modified the desk slightly by closing off the back of the side shelves under the table.
I intended to use the underside of the desk as storage as well (waste not, want not!) and didn’t want any of that peeking out from the shelves.
I have a couple of inexpensive cube units from my previous setup that I kept to store underneath.
This is also where I keep the foam boards I use for photography and my giant sewing mat.
And, of course, I had to have an Ikea Turquoise Råskog Utility Cart. It’s the perfect height to stash under the desk and roll out when I need it.
I keep paint pens, note pads, large adhesive bottles, commonly used paper punches, and more here.
I also utilize the outside of the cart by using magnets to hold things.

I try to keep my desktop fairly cleaned off, but that doesn’t always happen.
A few things I DO always keep on my desktop are a small bucket for trash, a cute little colander with a small note pad and pencil (I’m addicted to writing lists!), and a small mouse pad to put drinks on that I bring up to the room.
I also keep my blog calendar handy and, you guessed it, another note pad!
I painted a working ruler on my desktop which is great for measuring fabric and ribbon and various craft projects quickly so I don’t have to dig out a ruler. I drew the dashes and the numbers with an Elmer’s paint pen.

Some other extra details I added where these vinyl words on all of the doors, drawers, and bins.
With so much hidden storage I occasionally forgot where to find things without opening multiple items!
Plus I really like labels. And organizing things.
Unfortunately this wasn’t a single font, but 3 I pieced together for each word so I can’t exactly share it with y’all.
It was a bit of work but TOTALLY worth it in the end! And, of course, if the products stored inside happen to change I can simply change out the vinyl.
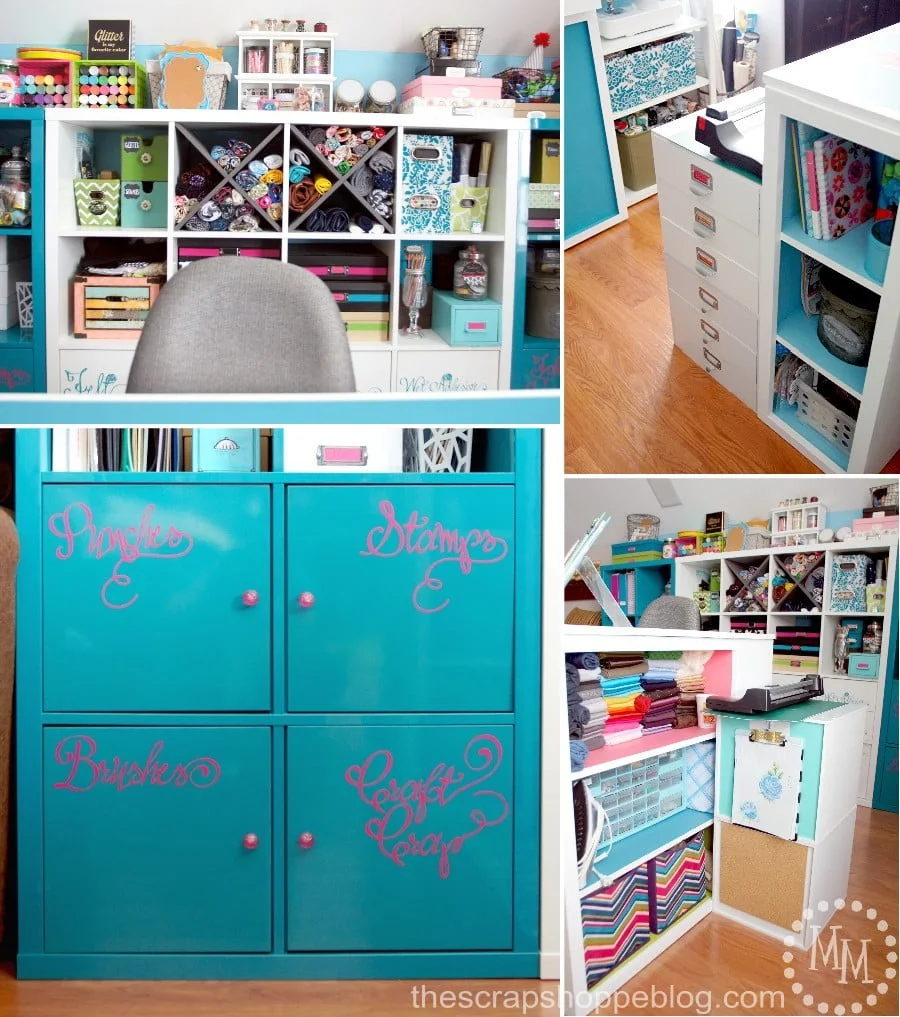
A few more details of the room…
I love that I can reach most all of my main supplies without getting out of my desk chair (which may need a makeover, too, what do you think?).
I keep some drawers on the far side of my desk full of paper scraps, cardboard, and sewing supplies.
On top of them I keep my favorite cutting mat (for paper) and my oversized paper trimmer.
To keep up with functionality, I hung a hook to hold an often used clipboard on the back of the top set of drawers and put a 12×12 corkboard on the back of the bottom set of drawers.
I also wanted to show that not all of the hidden storage was completely organized.
I do have a compartment completely dedicated to “Craft Crap” that doesn’t have a good home. I labeled it as such.
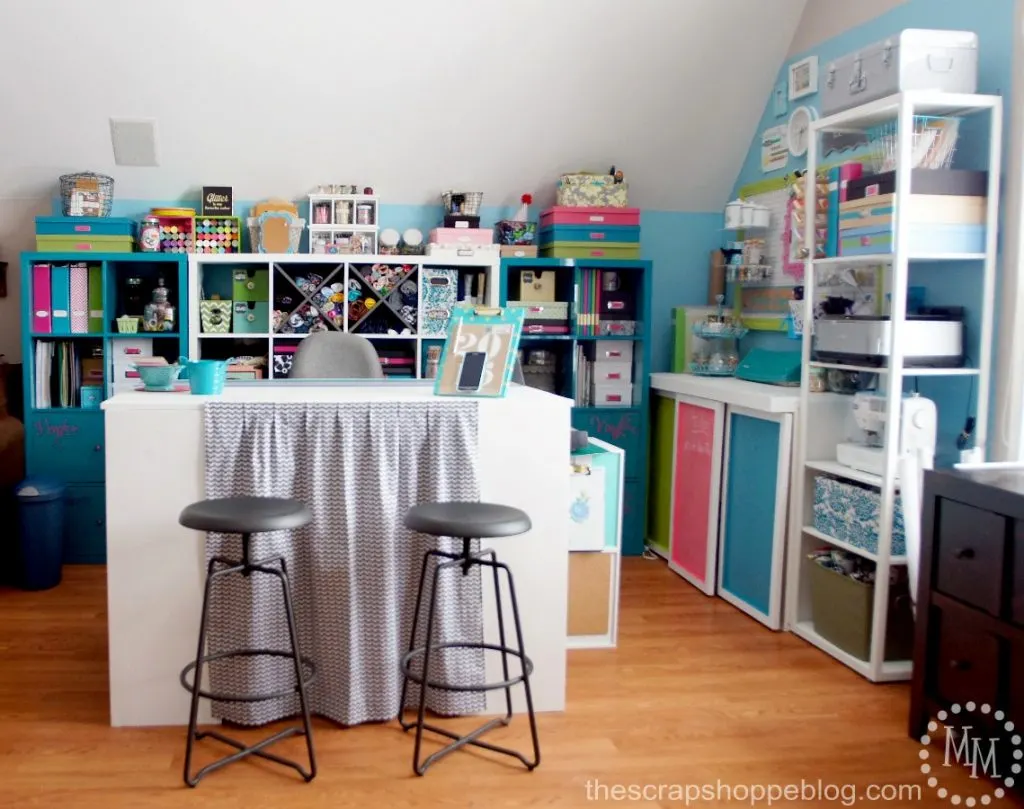
To truly define the space as my own, I painted the walls to border my area.
I couldn’t stand the beige walls to be in my “bright and cheery” craft space! It’s hard to tell, but the edges all have a scalloped border, except where the wall meets the ceiling.
I also recently added a curtain to the front of the desk to hide all the storage going on underneath. I attached it with Velcro. My two littles love to sit on the stools and do crafts on the table.
That’s about it! If you have any questions on how I store any of my items that I didn’t mention please feel free to ask!
I hope you enjoyed this craft room reveal.
Angie from The Country Chic Cottage will be hosting new Craft Room Tours all week long! You can check in with her for all of the links to fun blogger craft rooms.
I don’t know about you, but I love to see how other people store their craft supplies!

>> See where I party! <<

Tori
Tuesday 10th of November 2020
I was wondering if you would consider selling your craft bin labels on Etsy??
Susan Phelps
Monday 6th of August 2018
WOW!! That is an AWESOME craft room!
Lux G.
Saturday 2nd of September 2017
I'm in love with your craft room. I super love pink and other pastel colors. This is paradise!
Judy
Tuesday 29th of August 2017
I absolutely love this craft room. I will be featuring this tonight at my Sizzle into Summer party that opens at 8pm EST. Please stop by and pick up an I've Been Featured button. Thanks. http://diybydesign.blogspot.com
JamiE
Monday 28th of August 2017
Wow - that turned out amazing! So happy for you to have a space like this to use. :)