Blow up your favorite Silhouette image, print it out, piece it together, and trace it to create stunning chalkboard art!
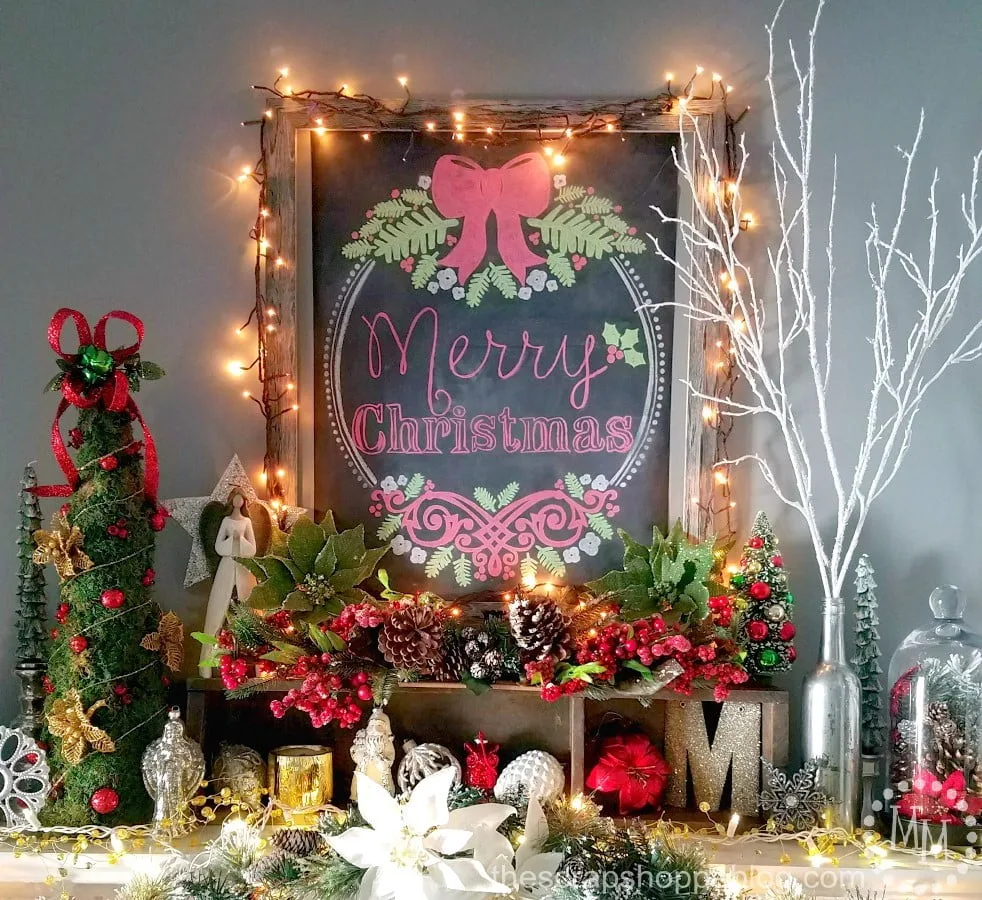 I’ve showed off a couple of pictures of my 2016 Christmas mantel on Facebook and Instagram. I also hinted that part of it may look familiar… The chalkboard art! It’s the same design I shared several weeks back as a FREE download for the Silhouette Studio software. I blew the design up and used it as a template for the chalk art. And I’m going to show you how to do it with any Silhouette image.
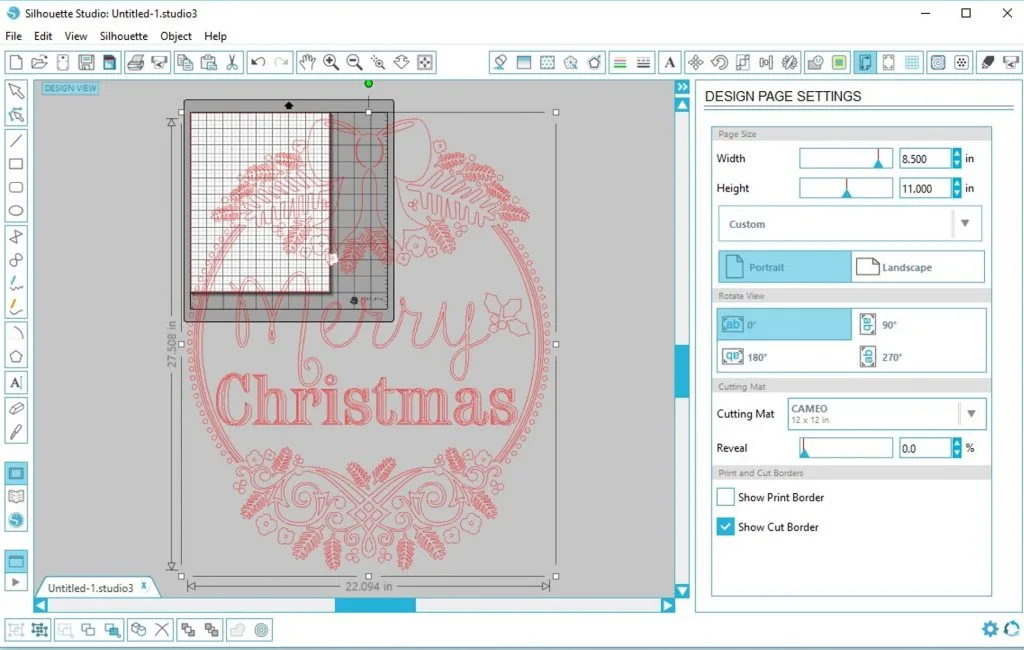 Open the image you want to use in the Silhouette software. Resize it to fit your needs.
Change the PAGE SIZE to 8.5×11, standard printer size.
 Click on the LINE STYLE icon in the toolbar (highlighted in the image) and select the solid line and change the line thickness to 2.0.
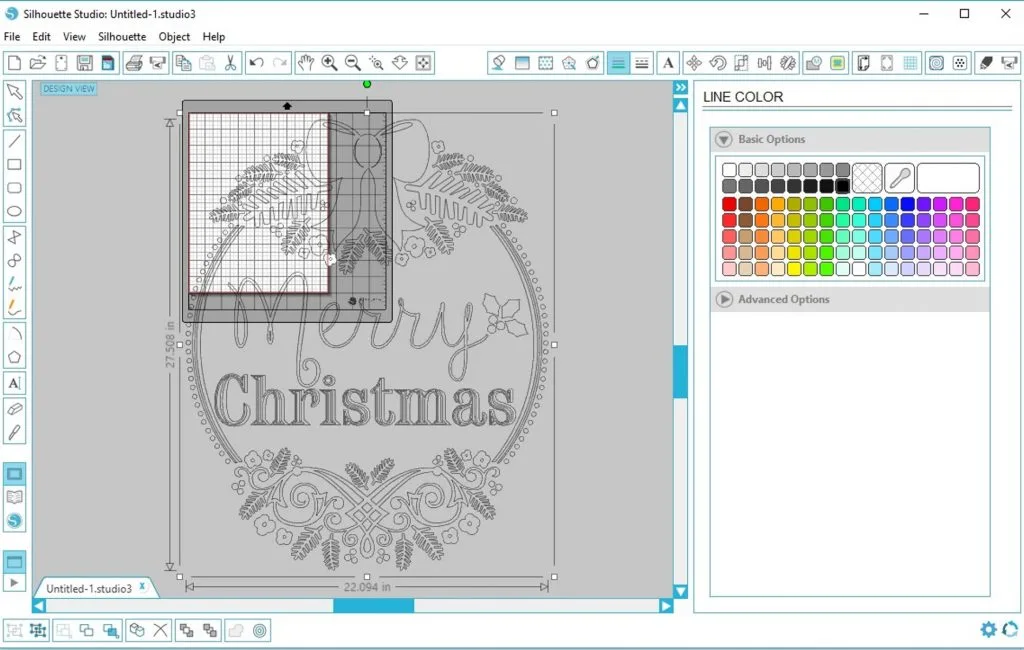 You can change the line color of the printed image if you choose. Most of us have a lot more black ink in our printers than color so I opted for the color change. To do this, click on LINE COLOR in the toolbar and select black.
 Line up a portion of the image on the 8.5×11 page in the software and print.
 Move the image around and print until you have printed the entire thing.
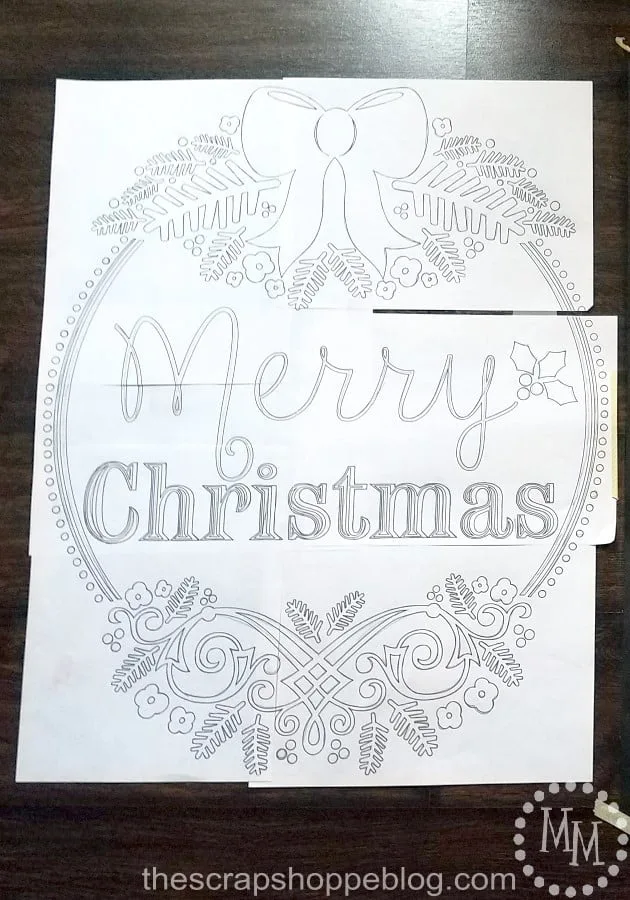
It took 6 sheets of paper to print this image the size that I wanted it.
Once all the parts are printed, trim off any margins that are in the way and piece the image together. Tape in place.
Now you can use it however you like!
 To create my chalkboard art I use those inexpensive chalkboard table runners (you can often find them in the Target Dollar Spot) and a cheap picture frame. The frame was a custom Hobby Lobby reject. You know, those ones they create by hand but end up messing up a measurement somewhere so they sell it for a heavy discount? Yep, my favorite frame!
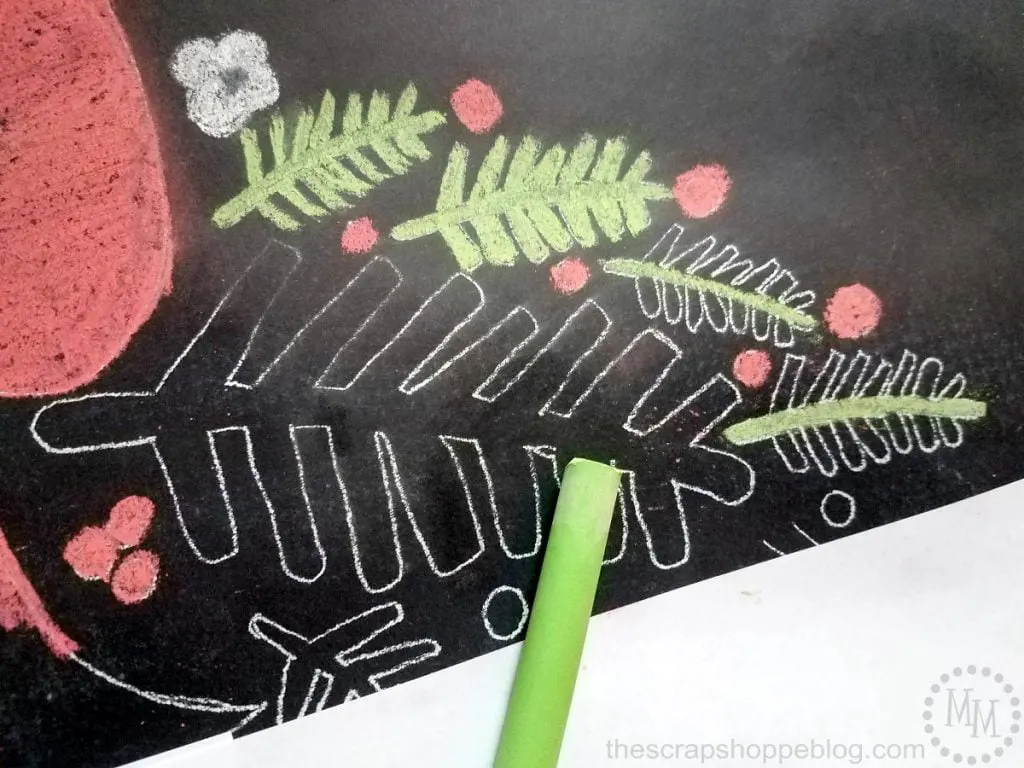
I trimmed the chalkboard runner to fit the frame, taped it to a smooth flat surface (in this case my living room floor), and prepped the runner by rubbing white chalk all over it then erase it. Next you will trace the image onto runner using white tracing paper. Place a piece of the tracing paper chalky side down on the chalkboard runner then line the printed image on top of the runner. Use a pencil to trace the image onto the chalkboard runner. One piece of the tracing paper will work for the entire image so just keep moving it around as needed.
Once the entire image is traced, go back and color in the image with chalk. I used green, red, and white for this image.
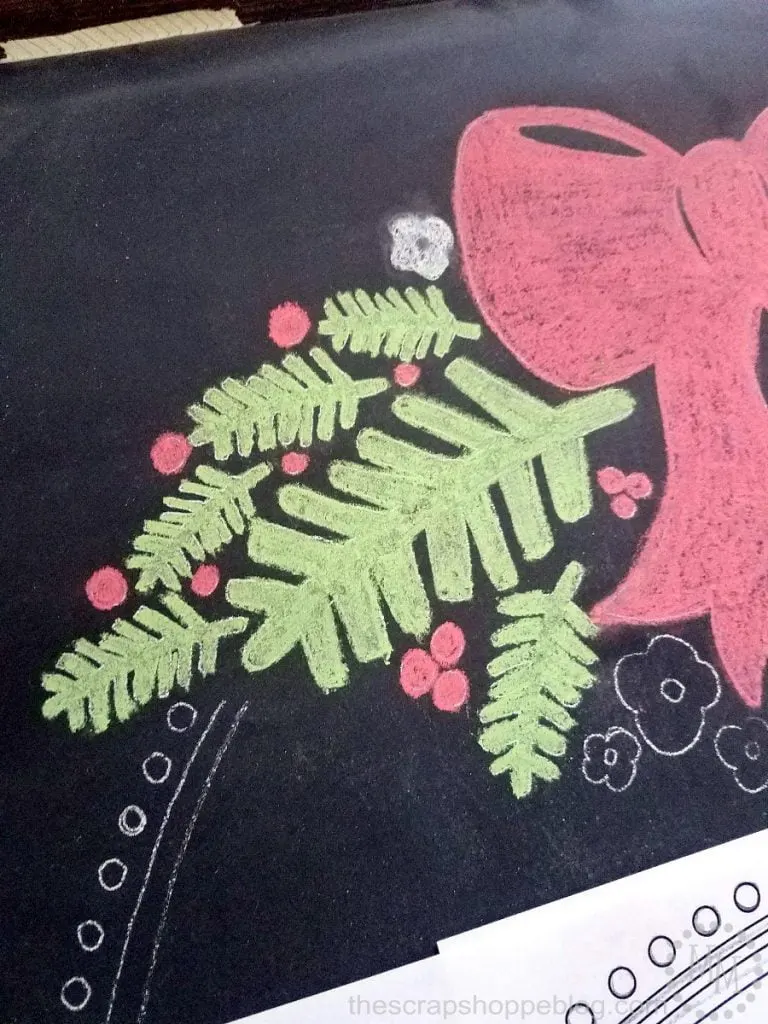
To keep the image neat and not smeared, work from the top of the image down. Use the printed image as a buffer between you and where you’re working, moving it down as you go.
 It took a bit of work but I absolutely love how it turned out! And I should be able to preserve the chalkboard art after Christmas by placing a sheet of tissue paper over it then rolling and storing it into a tube.
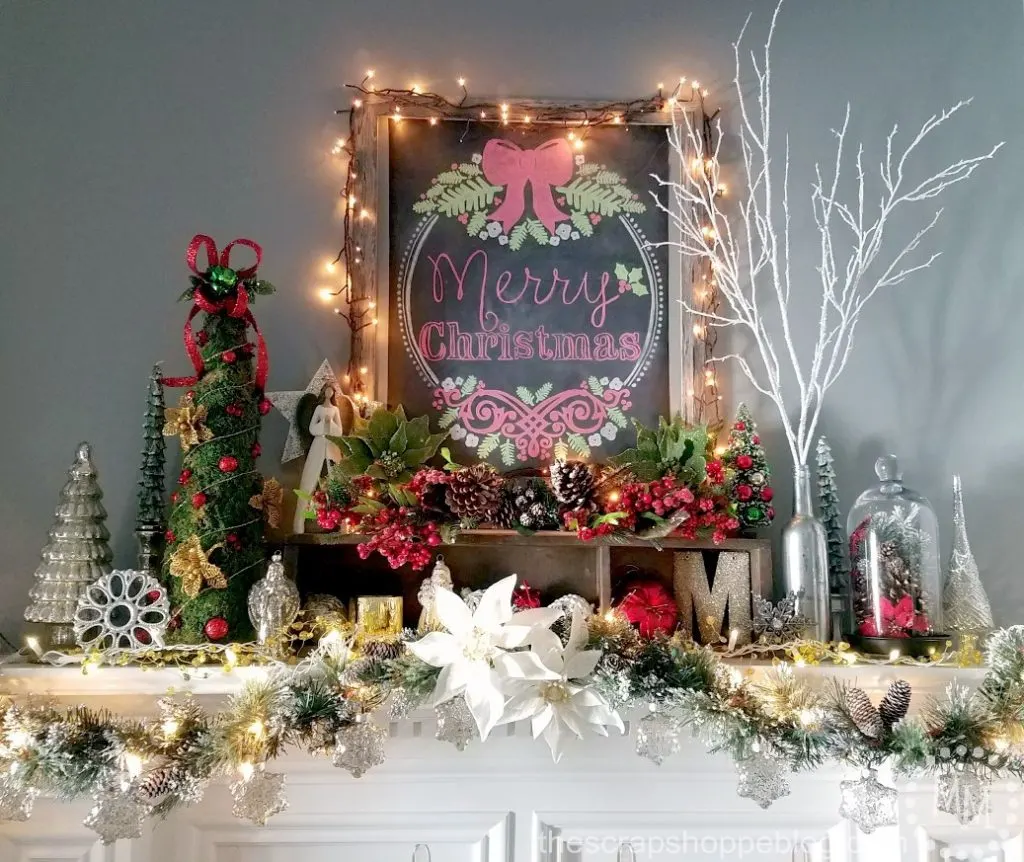 I taped the chalkboard runner to the back of the frame then I hang it on the wall above my mantel with 3M Picture Hanging Strips.
So that’s how I use an oversized print from the Silhouette Studio. How would you use one?
Bonus: The large print that I made? It makes for an excellent oversized coloring sheet for my kiddos.
Linking up to Flamingo Toes, Today’s Creative Blog, Tidymom, My Repurposed Life,
Tatertots & Jello, and other great parties found on my party page.


Debra Needles
Saturday 7th of January 2017
Wow. That's beautiful. Next Christmas will you do my chalkboard. Thanks for stopping by the Funtastic Friday linky party!
Jen @ Noting Grace
Friday 30th of December 2016
Wow ! This is stunning! And what a great tutorial. Definitely pinning to save for next Christmas!
Christine
Thursday 29th of December 2016
I love this, with my handwriting I would NEED a template like this. lol Thanks so much for sharing this with us at the DI & DI Link Party.
Carol
Wednesday 21st of December 2016
Brilliant!