
Take your organization and storage UP off of your desk and onto your wall with a DIY embroidery hoop wall organizer!
This post contains affiliate links.

Office supplies are a weakness of mine.
I collect them like kids collect stickers!
But sometimes I need them up off of my work space so I love the concept of vertical storage.
Why not hang your office supplies above your work area to free up more room with a DIY embroidery hoop wall organizer?
You can easily make a small organizer with an embroidery hoop and a few supplies.
It’s no sew and it will hardly cost you a thing!


DIY Embroidery Hoop Wall Organizer Supplies:

Embroidery hoop (this one is a 10″)
Marker
Scissors
Hot glue gun
Bandana
Trim (optional)

DIY Embroidery Hoop Wall Organizer Directions

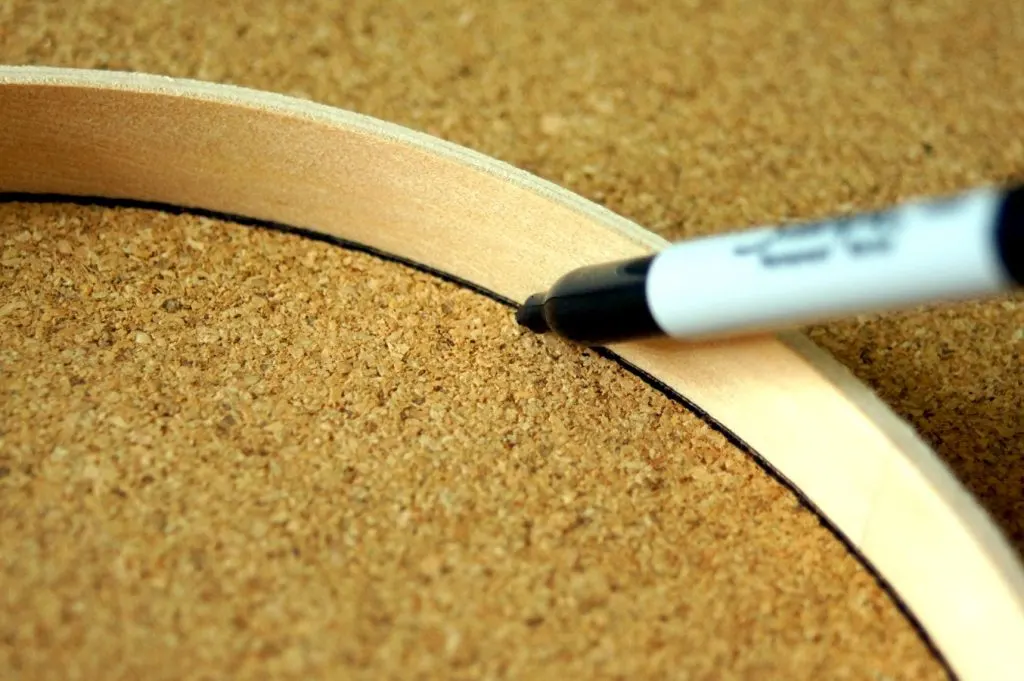
The first item of business is sizing the cork to fit inside the embroidery hoop.
To do this, remove the inner hoop and place it on the cork.
Trace the interior of the hoop onto the cork with a maker and cut out the cork shape.

Place the interior hoop on your work surface and place the cut out cork inside.
Push the cork so that it is flush with the bottom of the hoop and place hot glue all around the back edges to keep it in place.
When you flip the hoop over you can see the cork flush with the hoop.

Create one or more pockets on the cork with the bandana by cutting it into pieces that will fit across the front of the hoop.
For more than one pocket, layer the fabric.
To be sure to see the pattern on the bandana you can iron down the excess fabric along the edges so it falls to the back.
To create multiple divisions in the smaller front pocket, use 1/18″ double sided Hercules tape on the back side of the front fabric pocket.
Alternatively you can stitch the divisions.
But I like the look of the tape better so no stitches show up on the bandana pattern.
Arrange the pockets on the embroidery hoop and place outer hoop over the inner hoop.
Tighten the screw and pull bandana fabric as needed to straighten and tighten it across the cork.
Trim off excess fabric from the back of the hoop.

And because everything looks a little more fun with trim, hot glue some around the edges of the cork if desired.
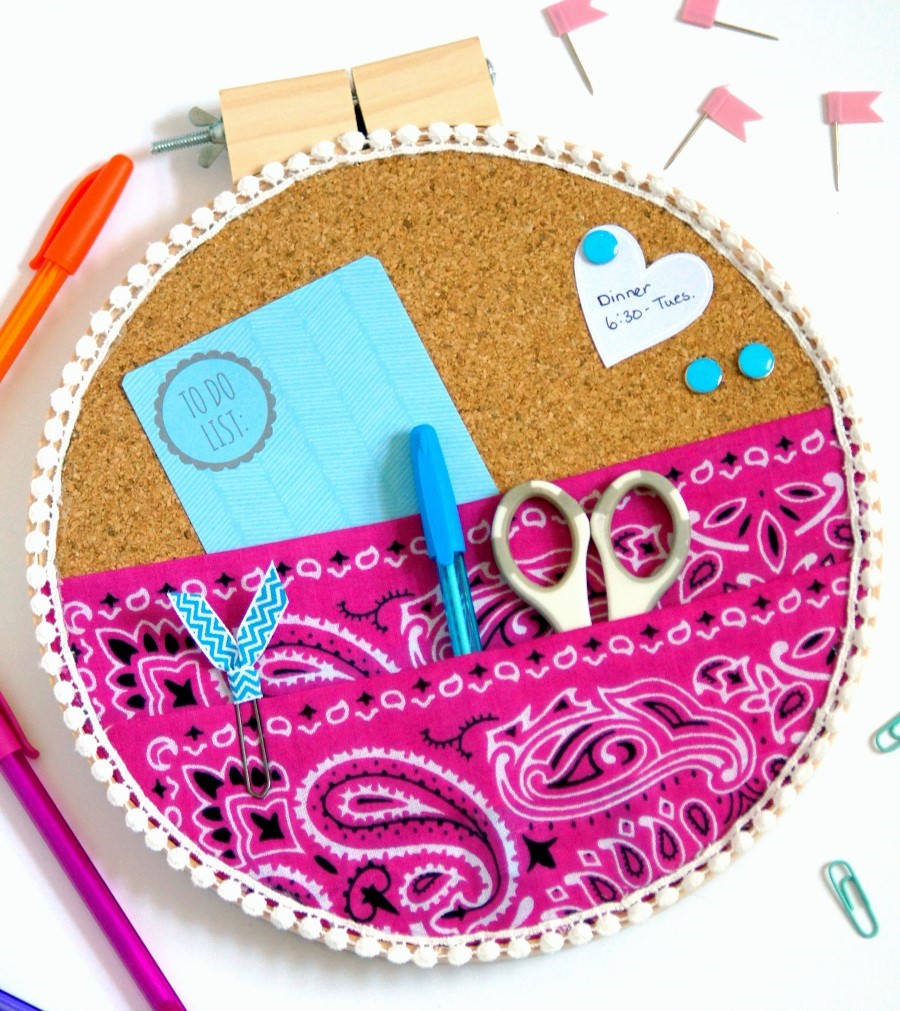
Hang the DIY embroidery hoop on your wall and use thumbtacks to hang reminders on the cork.
Place a notepad in the large fabric pocket, and fill the front pocket with pens, scissors, and whatever other accessories you keep nearby.
This DIY embroidery hoop wall organizer is so easy to make and cost effective- I think they would be super fun to make for all your friends as gifts!

>> See where I party! <<
Erin @ My mommyworld.com
Friday 15th of February 2019
This is such a cute project! My tween daughter would love to have this in her room...I think I'll work on making one to give her for her birthday next month. Thanks for the great tutorial!
Sheri
Friday 8th of February 2019
So fun! Thanks for sharing at To Grandma's House We Go DIY, Crafts, Recipes and More Link Party. I pinned this! Hope to have you join again next week. Have a great day!
Alice V-DIYerfy
Thursday 7th of February 2019
Neat idea, Michele! Thank you for sharing at #OMHGWW and hope to see you next week!
Roseann Hampton
Wednesday 6th of February 2019
What a great way to add color to your organization! This will be one of my features this Saturday at the Snickerdoodle link party.