I am so excited about this week!
Why? Because I am teaming up with the Jewelry Queen herself, Bev at Flamingo Toes, to cohost
Jewelry Week!
Every day this week Bev and I will present you with a new jewelry tutorial.
I can’t wait for you to see everything we’ve made!
I’m kicking off the week with a little knock of myself!
A couple of years ago I made an eclectic braided bracelet and ever since I have wanted to try making a necklace in a similar manner. A few months ago I participated in a handmade jewelry swap and I knew it was finally the opportunity I was waiting for to make the necklace!
Suppplies:
beads
chain of various sizes
2 3-ring spacers
crimp beads
thread
jump rings
necklace clasp
First you need to decided how many pieces you want in each of the 3 strands of the braid.
I’m going to use 3 pieces per braid strand.
Two of the three pieces will be chain.
I went ahead and decided which pieces of chain I was going to use for each of the 3 strands and trimmed the chain to the length I wanted.
The 3rd piece of each strand is going to be beads.
To create the bead pieces we need to start with a jump ring, thread, and a crimp bead.
Thread the crimp ring then wrap the thread through a jump ring then back through the crimp bead once again.
Cinch the crimp ring and start threading your beads.
Once all of the beads are threaded, finish the strand off with another crimp bead and jump ring.
Repeat the process two more times for a total of three strands of beads.
Line of the chain and beads into the sections of the braid they will be in.
Attach the three pieces of each strand of the braid to a large jump ring.
Attach each large jump ring to the 3-ring spacer.
Spread the strands out so you can see each of the 3 sections well.
Begin braiding the strands.
(Tip: I set something heavy on the spacer to keep everything still as I braided.)
Continue braiding until you reach the end of the strands.
Attach large jump rings to the end of each of the 3 strands then attach the jump rings to another 3-ring spacer.
Attach a jump ring to the other side of the spacer and attach the chain for your necklace.
Attach the necklace clasp.
Isn’t it chunky and fun?
I think eclectic is definitely a good word to describe this necklace!
What do you think? Is eclectic for you?
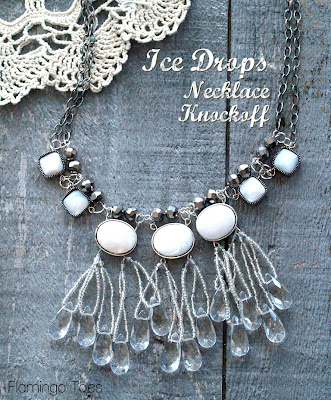
Be sure to visit Bev and see her tutorial for her Anthropologie knockoff of the Ice Drops Necklace!
And come back tomorrow for two more brand new jewelry tutorials!
Linking up to Flamingo Toes, Skip to My Lou, Today’s Creative Blog, The Shabby Creek Cottage, Tidymom, 504 Main, Serenity Now, Whipperberry, My Repurposed Life, 30 Days, Tatertots & Jello, Positively Splendid, and other great parties found on my party page.


Ann Vickers
Monday 18th of August 2014
This looks complicated, but after seeing the instructions it does not appear to be. I will definitely try this one.http://www.finishingtouchesbyanne.com
Kim -today's creative blog
Monday 25th of February 2013
Thank you so much for taking the time to link up! I've got some new guidelines. I'm only accepting 200 links, so I'm limiting people to a 2 link max.
Carol TheAnswerIsChocolate
Monday 25th of February 2013
Just wanted to let you know I featured this as part of my link party wrap up this week!
DesignedByBH
Monday 25th of February 2013
Wow! I could absolutely do that! I make some other simple jewelry, but had shied away from real beads, etc. because I just wasn't sure how to do it...but it looks simple enough. Thanks for the inspiration! :)
TidyMom
Sunday 24th of February 2013
I love this! what a great job!Thanks for much for linking up this week! I featured your post in my wrap up http://tidymom.net/2013/great-diy-projects/
Have a great weekend!