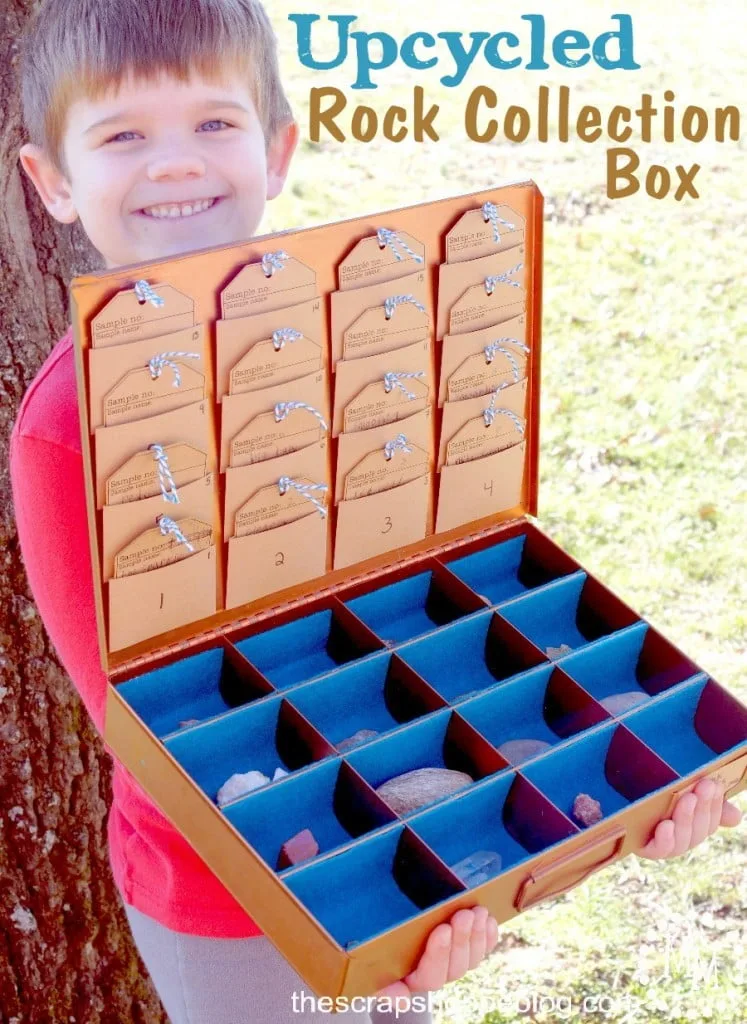
Backstory: Early last summer I happened across this vintage copper box at a barn sale. I didn’t know what I would do with it, but I just had to have it! There were 2 available so my mom bought the other one, also not knowing what she would do with it but having to have it (it’s hereditary!).
My 7 year old recently started a rock collection. After our vacation to Colorado last summer he really got his collection going, but the only way he had to store them was in little clear bags. Not super fun.
Enter my copper box! Wouldn’t it be perfect to show off my son’s most favorite rocks from his collection? It just needed a few alterations to be the perfect upcycle…
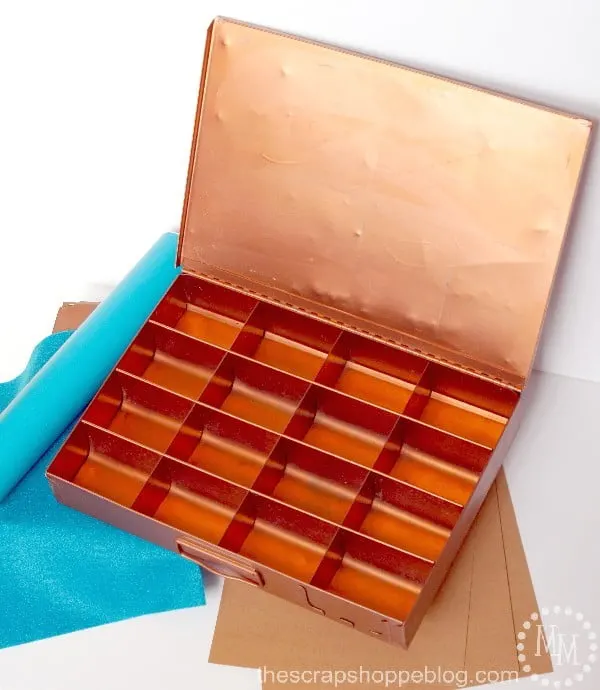
I just needed a few supplies to get this project started:
felt, vinyl, and kraft paper as well as various adhesives.
Also, my rock collection sample tag (free download!).
I chose a dark turquoise color for both the vinyl and felt because I thought it would look great on the copper, and easy to see.
I should also mention I gave the copper box a good wipe down with vinegar and a wet rag to clean off any excess dirt and grime.
 I created a personalized “sign” for the lid of the box and cut it out with my Silhouette Cameo. I also made small numbers, 1-16, with the Silhouette to place inside each compartment of the box. This way my son can keep the rocks organized and know what is what as the sample tags will match up with the compartments as you’ll see soon.

I trimmed the felt so that it would fit into each compartment in the box. It took 3-4 sheets to fill the box.
I used Zip Dry wet glue (affiliate link) to attach the felt to the box. Zip Dry lives up to it’s name and dries super quick. It’s mainly used for paper crafting, but worked great for this project as well.
To adhere: I applied a line of glue to the top edge of the one of the compartments then pressed the edge of the felt firmly in place. I gave this a couple of minutes to dry. This way the felt was not likely to move out of place while I was working with it. I finished applying the felt by placing glue along the bottom and top of the other edge of the compartment (see white lines in photo above).
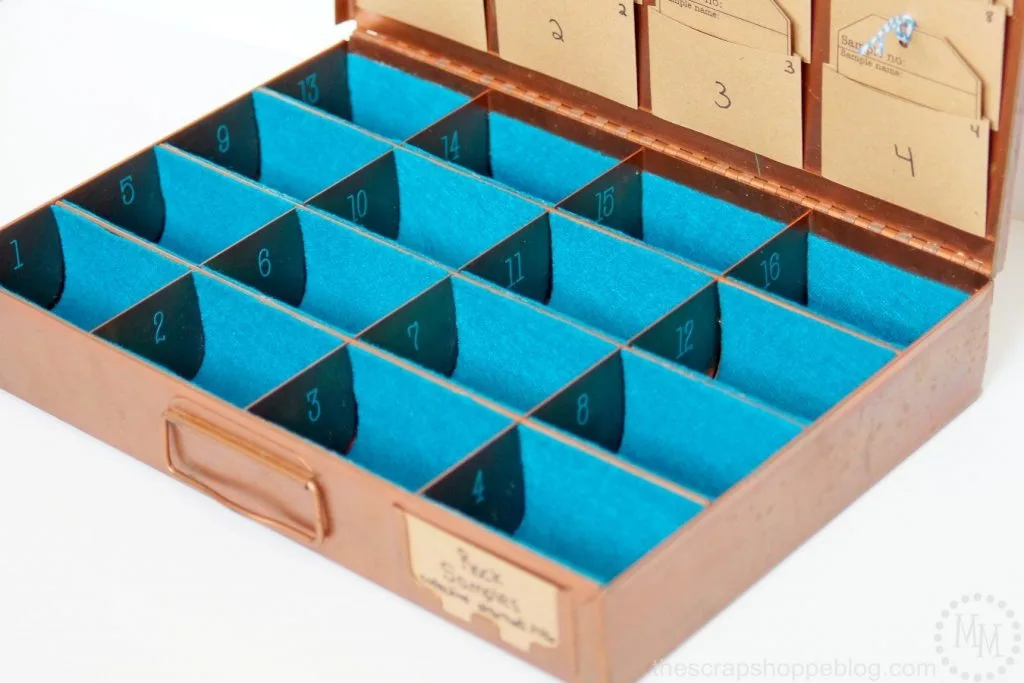 Continue applying the felt to all of the compartments.
Now the rocks won’t create a racket being placed in and out of the box. Also, the lid doesn’t latch on this box so it can only be carried flat, so this is really as much felt as is needed to be functional.

Print and cut sample tags. I used Kraft paper because I feel like it lends to the vintage feel of the box. The tags have a place for the sample number to be written which can be matched up with the vinyl number on the compartments. Punch a hole in the top of the tags and thread with some twine. Now we just need a way to keep the tags in the box!
Tags are 2.5 x 3″ at border. I cut them slightly larger by trimming outside the border.
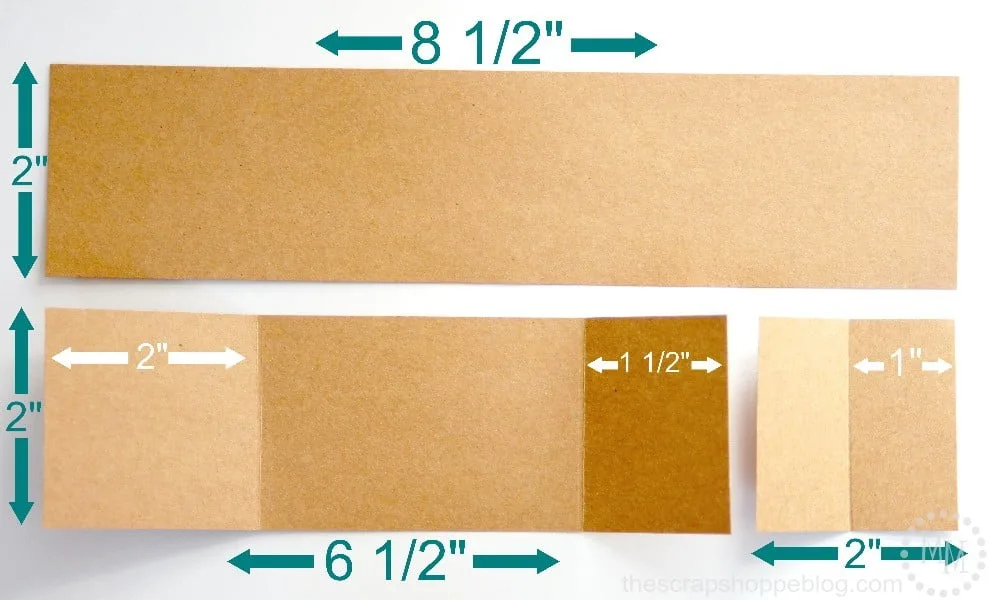 I decided to create my own pocket to hold the tags. This way my son can easily pull them out to fill them out and look at them, and they would be custom-sized to fit the tags and the box. I wanted the half envelope to be 3 x 2″.
– I cut 8.5 x 11″ sheets of Kraft paper into 8.5 x 2″ strips.
– Cut 2″ off the end of the 8.5 x 2″ strips creating a 6.5 x 2″ strip and a 2 x 2″ piece.
– Score (in white above) the 6.5 x 2″ strip 2″ in from one end and 1/2″ in from the other end. Score the the 2 x 2″ piece of paper directly down the middle.
 To piece the pockets together, fold the small 2 x 2″ piece of paper and adhere one half of folded piece on the bottom of the longer strip centered between the score lines.
Place adhesive on the back of the folded piece of paper and fold over shorter end of strip. Place more adhesive up the side of the longer end of the strip and fold it over as well.
 Now we have a nice little pocket! And the tags fit in perfectly.
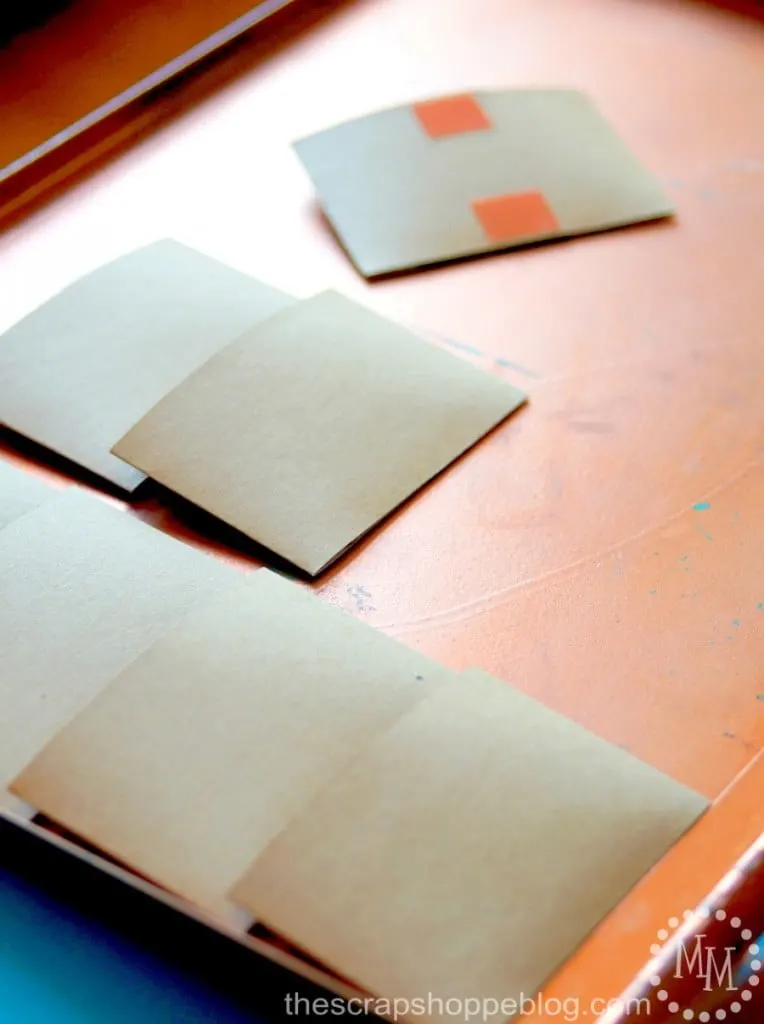
I used Sticky Red Tape (affiliate link) to attach the envelopes to the inside lid of the box. This adhesive is SUPER sticky so be sure you get it place correctly the first time! Only apply the adhesive to the center of the pockets so that they can still “pooch out” (that’s a technical term!) so that the tags can easily be moved in and out.
 I had to slightly overlap the pockets to fit all of the tags, but everything fit perfectly inside! I went back and numbered the pockets so the right one could be easily found.
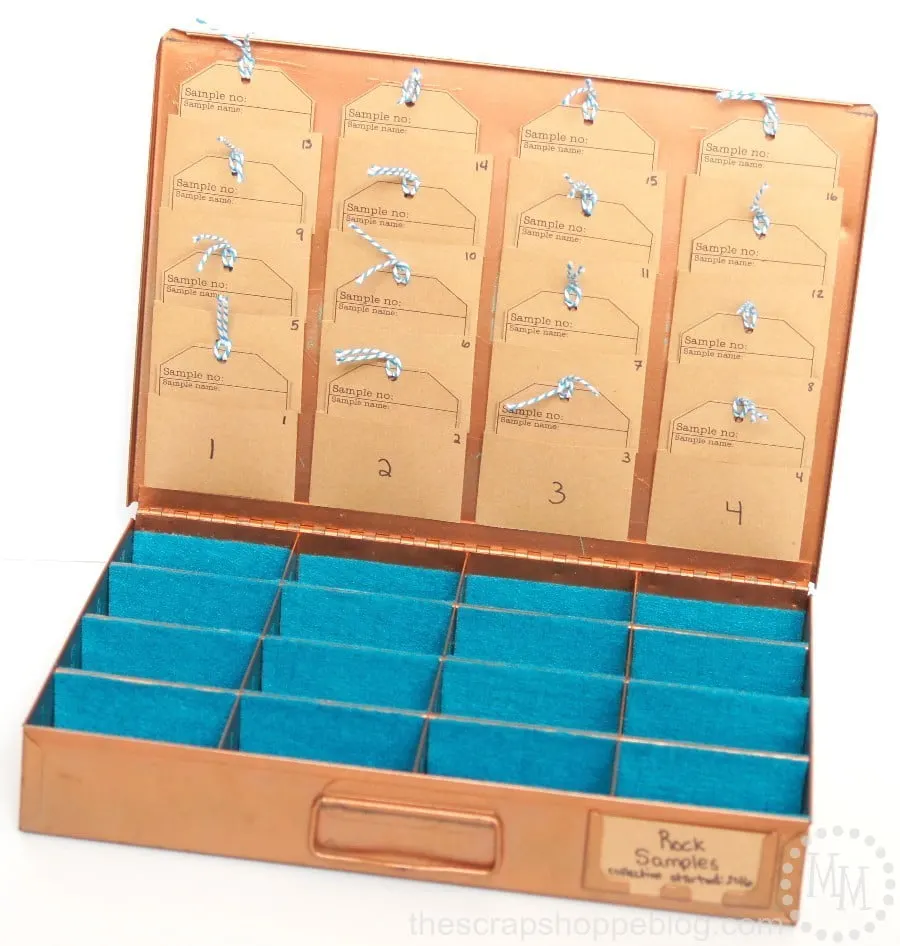 I added a piece of Kraft paper to the slot in the front of the box, and I was done!

My little guy IMMEDIATELY started filling it up with his rock collection and filling out the tags. He likes to organize to his mommy! Of course, he’ll only be able to keep 16 of his pieces (or more if he doubles up) in the box, but it will be a great way to store and show off his favorite rocks!
And, of course, my younger son now wants one. Luckily my mom let me buy her vintage copper box off of her so looks like I’ll be making another rock collection box!


Benjie
Tuesday 30th of October 2018
I would like to buy a rock box like this with my grandson’s name on it. Is that a possibility?
Michele McDonald
Tuesday 30th of October 2018
I'm afraid I do not have any for sale.
Amy
Saturday 21st of July 2018
This box turned out amazing. I have a nine year old grandson that would love this. Thank you for sharing on Best of the Weekend.
Michele Michael
Wednesday 18th of July 2018
This is a wonderful project. Perfect for this time of year. Could also be used for painted rocks and seashells. I will be sharing on Coastal Bohemian and pinning on my Coastal Bohemian pinterest boards. Would love for you to link up with us at Funtastic Friday too.
Frugal Hausfrau
Tuesday 15th of March 2016
What a clever idea! I love it and so does your son by the looks of things~ Thanks for sharing this with us on Throwback Thursday!
Mollie
Marie
Tuesday 15th of March 2016
My son is going to love this idea! Thank you so much for stopping by the Learn & Play Link Up. This post is featured on Christian Montessori Network this week!