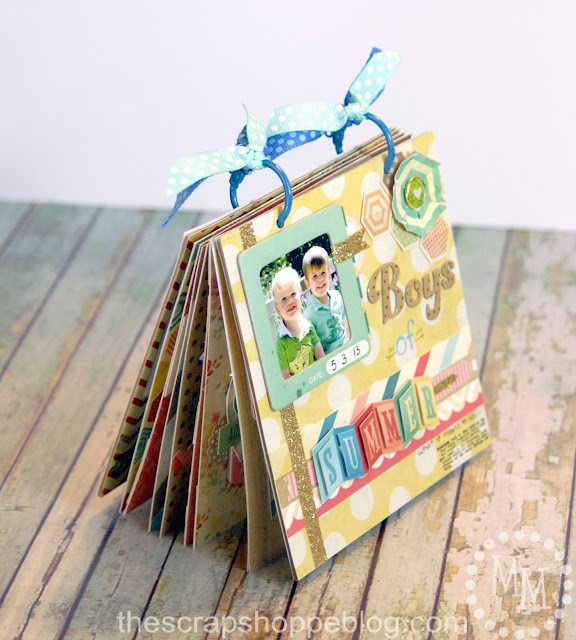
Don’t miss these tips and tricks for maximizing a mini album in my Boys of Summer album!
Way back in the day (almost 4 years ago!) this blog started out with a lot of scrapbooking projects and scrapbook-related tips and ideas.
Then my crafting evolved, and I stepped outside of the world of paper.
But I love going back to it when the opportunity arises!
Today I want to share some scrapbook tips and tricks to help making your crafting more efficient and, possibly, more fun!
All while keeping it relevant and meaningful.
This is my Boys of Summer mini album.

Boys of Summer Mini Album
Can you believe this little handmade 6×6 mini album has a whopping 17 pages and more than 30 photos in it?
AND I made it all in one weekend? And, no, I wasn’t home alone. Life still went on!
There was laundry, meals, playing with children, and all that goes on with normal life occurring with me sneaking in some scrapbook layouts during nap time, coloring time, and bedtime for my boys.
Here are my tips to help you GET.IT.DONE. and make something you can be proud of while capturing all of the precious memories that have been made.
My number 1 tip for making scrapbooking worthwhile is to make mini albums.
Whether you’re buying a small album (6×6 or 8×8) to fill or making an album by hand like mine, they are much easier and faster to make, not to mention less intimidating, than trying to fill a 12×12 album, in my opinion.
My number 2 tip is to have a theme! Don’t scrapbook at random.
Having a theme allows you to knock out an entire life event in one album.
My number 3 tip is to use a kit or a scrapbook line to create your album.
This simplifies the process SO much and is a real time saver because everything you need to make the album is at hand (from paper to matching embellishments) and helps keep everything cohesive.
For my Boys of Summer mini album, I used the Crate Paper The Pier line from American Crafts.
I chose the theme of summer activities which matches perfectly with The Pier line.
And I used pictures from the last 3 summers (my sons’ first summers together) which knocked out 3 years of photos that have been backlogged on my computer!
Shown above are my cover and final page of the album.

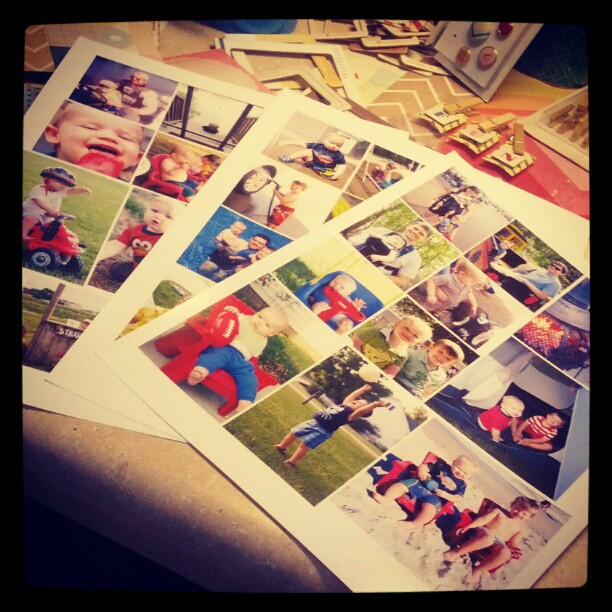
I shared this photo on Instagram the weekend I was making the album.
I went through all of the summer folders on my computer grabbing pictures that I wanted to be sure to include.
I like to print my photos as I need them rather than having boxes and boxes of them waiting to be used.
That can be a little overwhelming to have hanging over your head!
And besides that, I don’t know what size my photos will need to be to meet my purpose for each album.
Full size photos don’t work as well for mini albums.
What I like to do is size my photos down to a reasonable size for a 6×6 album (my photos for this particular album ranged from 2×2, 3×3, and 2×3) and fill up an 8.5×11 sheet of photo paper with the resized photos for printing at home.
I have an old outdated drawing/photo program I that I like to use, but I’m sure other drawing programs have the same capabilities.
The key to creating multiple layouts in a small time frame is to keep the it simple.
You don’t need a lot on the page to distract from your photo and the message you are trying to get across.
For most of my pages I used a strip of paper, an embellishment, and tag to write my information on along with the photo I was using on the page.
Easy peasy!
It looks clean and the eye is drawn to the photo first which is the most important thing on your page.
For this album I also am not doing a lot of journaling.
The photos represent the summer activity and speak for themselves.
For me, the key thing to include is the date of the event.
But that is not the norm for most of my mini albums.
There are some simple ways to include multiple photos on one page of a layout.
Even ones this small!
I’m a big fan of making my albums interactive; meaning I want the person looking at it to get involved and have to do something to see more photos.
I think it makes it more fun!
Also provide tips on the page so that the person looking at the album knows that something is expected of them.
On the pages above I simply wrote “slide” to know that they can slide the tag to see something new underneath it.
Another trick to sneak in multiple photos is to make little accordion albums on a page.
These are SUPER simple to make and can help maximize your space!
In the layouts above, the top layout has a total of 6 photos on the page; the middle layout has 3 photos; the bottom layout has 4 photos.
I had multiple photos that I really wanted to include for each of these pages and I was able to do so!
Hint: I used strips of Velcro on the bottom two layouts so that the slide frames can easily be lifted up to open the accordion by separating the Velcro. In the top layout, a piece of twine wrapped around a brad holds the accordion down and can be easily released.
I adhered the front cover and second page to some scrap thin cardboard (I keep a drawer full for just such a purpose!).
I did the same with the final layout and the back cover.
I adhered the rest of the layouts back-to-back.
Then I punched two holes at the top of each page.
Use a couple of binder rings to hold it all together and decorated with ribbon.
The theme of Boys of Summer and feel of these papers is very vintage chic and scream summer fun from days gone by.
Here are a couple of other mini albums I have shared in the past.
Bringing Home Baby and Baby’s 1st Year
I hope this has encouraged you to create something!
Whether you used to scrapbook & don’t feel like you have time for it anymore or have thought about trying scrapbooking but didn’t know where to start.
You can do this!

>> See where I party! <<
This post was originally shared June, 2013.

Leslie Germain
Monday 17th of June 2013
Love your mini album. So glad I saw it on Craft o Maniac Monday. Love finding other paper crafters. Stop by and say hi. Lesliewww.thememorynest.blogspot.com
Virginia Megin Gallagher
Thursday 13th of June 2013
Super Cute! I paper craft, too, and love mini albums. They are fun to have on my desk at work for when I need to have a little mental break and re-visit vacation time.I'm visiting today from House of Hepworths. I hope you get the chance to visit my blog, linkup and and leave a comment, too!~ Megin of VMG206Join me each Tuesday for Brag About It Link PartyJoin me Saturday at 5pm Central for DIY Showcase Link Party
Jean Bullock
Wednesday 12th of June 2013
Great tips. Your little albums are darling.
Crystal
Tuesday 11th of June 2013
You did an amazing job on your photo books!! They are so fun and cute!!
Katie from Katie's Nesting Spot
Tuesday 11th of June 2013
Cute and I agree using a line of papers and embellishments is a great time saver!